Welcome to the Cadillac XLR Forums!

Replaced Radio/Navigation unit in my 2009

Thanks to both for the pics!
Looks like a LOT of wiring behind the console and radio!
Hopefully the Metra kit has the correct adaptor to plug into the factory harness?
Pry tools come from Eastwood or similar vendor?
 
Thanks to both for the pics!
Looks like a LOT of wiring behind the console and radio!
Hopefully the Metra kit has the correct adaptor to plug into the factory harness?
Pry tools come from Eastwood or similar vendor?
I bought my set of pry bars from Harbor Freight years ago; they still carry them. When I ordered the kit from Crutchfield's, I had them do the splicing, an extra 25-dollar charge. The adapter harness is plug and play from my previous experience with a '93 Sevelle STS.
 
@Festus:
Thanks much for pry tool info, will have to get some from Harbor Freight.
Let us know how the Backup camera wiring goes (did you follow factory harness on trunk hinges).

I ordered two systems for my other vehicles from Crutchfield and worked out well.
Will have to check into it for my XLR next year.
Just a little gun shy of taking off panels in case they break.
We all know GM makes next to nothing anymore for these cars!
Plan A for the b/u cam wiring is to follow the 3rd brake light wiring harness then going low into the passenger compartment, tucking the wiring under the plastic trim along the bottom of the door well. From there behind the dash into the center console bay. I'm concerned about breakage as well; however, I believe that going slow and being careful, the panels will be okay. Here's a short video on panel removal that may be helpful:

Radio/CD removal XLR

I think the "tool" he says you need to remove the shifter is a Torx, not sure but I think it's the same size as the cubby between the seats needs for removal.
 
Festus, Thanks much for the Video link!
Is very helpful to see where the clips are and what is behind the console and radio panels.
Like you said, pry tools are helpful, I will have to get some.

My body guy gave me a tip for removing parts like bumpers and said sometimes they heat the clips up with a heat gun to help keep them from breaking. Maybe possible here but would have to be careful on interior panels, or use a hair dryer.
 
@CY1957-XLR

Glad the video helps.

A hair dryer may be the better choice if any heat is needed, at least my heat gun gets way too hot for any interior work.

Good to know for the bumpers!
 
@Festus:
Agreed on the heat gun and interior parts, mine is still pretty hot on low.

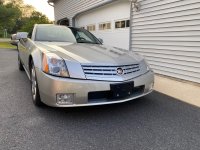
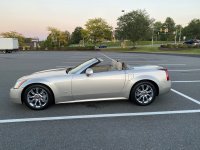
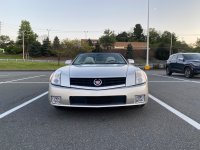
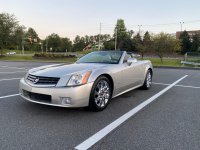
I used my heat gun on the front bumper of XLR when I took off the UGLY front plate holder (no front plate needed in PA). The screws holding it on had pulled out the cover. I used the heat gun and some nylon bar and blocks to "roll it back flat". Worked great, no effect on the paint either! I then got some plastic plugs and painted them to match and pushed in with some silicone to hold them. Not as good looking as "no holes", but much better than the plate holder!
 
Here is before & after with front plate bracket and std grille.
Blacked out the grille with MarHyde Black Satin paint.
Looks much better with Silver body color than with the silver grille (IMO).
Added 2009 Platinum wheels too.

What state are you in Festus, where you do not need a front plate either?

I'll keep on subject (radio info) after this :) !
 

Attachments

  • CY 2005 XLR_Sept 2023-2.jpg
    CY 2005 XLR_Sept 2023-2.jpg
    3.2 MB · Views: 87
  • 2005 XLR_At Youngs_After Outside Cleaned-2_6-18-2023.jpg
    2005 XLR_At Youngs_After Outside Cleaned-2_6-18-2023.jpg
    2.9 MB · Views: 81
  • CY 2005 XLR_Sept 2023-4.jpg
    CY 2005 XLR_Sept 2023-4.jpg
    3 MB · Views: 92
  • CY 2005 XLR_Sept 2023-5.jpg
    CY 2005 XLR_Sept 2023-5.jpg
    2.9 MB · Views: 87
@CY1957-XLR

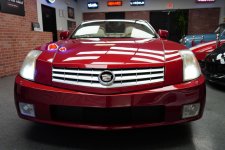
I really like what you've done with the grille. Those '09 rims look right at home. We're in CA. As you can see my car never had the front plate mount/bracket...so I never put one on it.

Back on the topic of radios...Unless we get a week or so of nice warm weather, my install is on hold.
 

Attachments

  • 2005 Cadillac xlr 2dr convertible .jpg
    2005 Cadillac xlr 2dr convertible .jpg
    294.7 KB · Views: 76
@Festus:
Thanks for comments on grille! Yes, I liked the 2009 wheels first time I saw them. I got lucky and found another forum member in NY that had a set and drove up to get them. Much nicer than the std 7 spokes with clear coating over polished.
I sure wish mine would not have had the plate on front, but originally was in ILL, then FLA, both require front plates.
Like you color, and silver grille looks good with red, because of contrast.

Warm weather in CA, I thought it was always warm there! LOL !!
Looks like you have some other nice rides too?
 
Assuming you are asking about aftermarket radio install in original faceplate, I used a Metra 95-6511 install kit and did some modifications to the side pieces. Looks good from the front.
 
Assuming you are asking about aftermarket radio install in original faceplate, I used a Metra 95-6511 install kit and did some modifications to the side pieces. Looks good from the front.
do you have any photos to show us the finished radio install and more information on how you modified the side pieces? thanks
 
@geepapa:
Yes, I would be interested as to how the camera wires would be run as well. Looking at the door sill plates, I cannot see how they get removed (unless pull up with clips, but will they break then??). Maybe wires could be run somehow thru console and into truck area, as the back part of console (storage compartment) can be removed to get to some of the top mechanism, so maybe then the wires could be run that way and under the carpet in trunk.

Looking at Hal's old stereo and cover, it looks like once that cover is off the front, it is easy to get to stereo to unbolt and hook up a new one. I am just leery of prying off covers and having clips break, especially ones you may not be able to get anymore!
If I already replied, I’m sorry but I’m sitting in a bar waiting for my food and didn’t do my due diligence to read all three pages of comments.

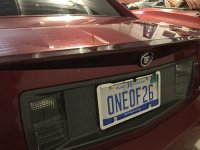
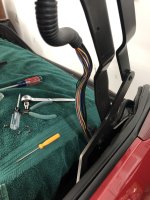
I installed a license plate cam and it works wonderfully. Starting at the center cluster, I ran the wires right down the center under the console. I grabbed power at the cigarette liter in the console as I went by. Fuse it! Remove the storage cubby and pop up int the trunk right there, then run along the carpeted trim pieces until you land in the box with the hydraulic pump for the top. From there, I disassembled the chases that carry the hydraulic hoses and ran the wire with them. It is difficult and time consuming. Add heat shrink tubing to any bend points or you will be redoing it later (ask me how I know.)

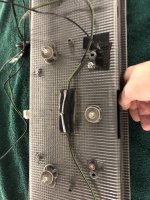
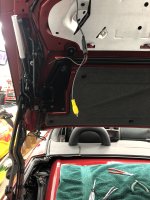
It takes some care to remove the trunk lid liner. Remove the license plate trim assembly and mount the license plate camera to it. The nice thing is you add a ton of plate security because the nuts are buried and inaccessible to thieves.

If you take your time and don’t cut corners, it is undetectable except for the camera itself which is still discrete. I’m experienced and it took over two hours (and over one hour to replace the wire later.). Sure hope I can find the photos! If not, they will become a reply later.
IMG_6916.jpeg
 

Attachments

  • IMG_0615.jpeg
    IMG_0615.jpeg
    2 MB · Views: 84
  • IMG_5196.jpeg
    IMG_5196.jpeg
    2 MB · Views: 82
  • IMG_5188.jpeg
    IMG_5188.jpeg
    2.7 MB · Views: 79
  • 66707955303__D66B121B-D629-4BE0-9CB8-AC2C8FD99405.jpeg
    66707955303__D66B121B-D629-4BE0-9CB8-AC2C8FD99405.jpeg
    1.9 MB · Views: 84
You have to excuse me, but that faceplate is just plain butt ugly. Doesn't do the car any favors.
I found the same problem looked so bad it came back out tried a vynal wrap look tacky maybe a chrome wrap might help but doubt it.right now it is some where in a trash pile.
 
Find someone to "dip" it with a look a like wood grain.
You know that was one of my after thoughs ( who knew?) I have done some hydro dip on the now long gone Goldwing face plate and took a few trys to get it right used a silver carbon fibre style. I think I will look through the catloge to see if there are any designs that would kinda match that OEM look, The next step if nothing was close one would need to do the entire center consol to make it right (in my humble opinion) and to each there own, just could not put up with that ugly black face frame. Hey just found this seems close:Tri-Edge Carbon Fiber | Liquid Concepts
 
Last edited:

Cadillac XLR Forums

Not a member?  Join now!  It's Free!

Learn more about Supporting Membership

Win 2 Supercharged Cadillacs!

Win both supercharged Cadillac Vs!

Supporting Vendors

Taput Tunning LLC

Top Hydraulics

Cadillac XLR Registry

Click here to enter the official Cadillac XLR and XLR-V Registry
Back
Top Bottom