Welcome to the Cadillac XLR Forums!

Help Finding a Coolant Leak - Pics

I can't imagine why an alternator would require water cooling. We've used alternators on race cars at high revolutions for decades! Frequently to cut down stress, a larger pully is needed, but liquid cooling..............egad!
 
99 sts uses a water cooled alternator also. That baby ain't cheap either!
 
I had this exact same problem. Turned out to be the water pump. Every time I would shut the car off and let it set for for five hours I would have a puddle under the alternator. The bearing in the water pump was slightly worn and it was cooling off and dripping out of there running down the hose and dropping under the alternator. Replace the water pump and I have had no problems since.
 
Help to find a coolant leak

Greg
Thank you for being so precise with your info. This tread will be valuable to any one that will have to change there rad in the future. After searching both forums I think rocket is the only one that has R&R his rad. With your open mindedness and research I'm hoping you can prove the manual wrong about pulling the A/C condenser . I know u will document your experience in this regard . You may need a transmission line tool to release the tranny lines. In one section of the manual it says you do in the R&R of the rad it says you don't. I'm only pointing this out so when u start if u need it you have it in your arsenal of tools
Good Luck
V Happy:blinzel:
 
Thanks Vhappy. It looks like the lines are simple quick connect fittings with a retainer clip. I've got some cheapo fitting removal tools I should be able to use. It looks like u just need to slide the collar of the tool under the retaining clip to make it clear the seat of the fitting, then pull back the tube to disengage. I may need to get a better tool that you slide in, then twist as per the manual, but I'll probably just jam it in there :laugh:

Man do I wish it was the water pump, this would be so much easier, and cheaper!
 
Generator Cooling

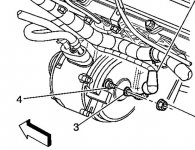
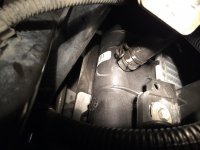
I found a good picture of the generator cooling hose assembly. You can see it on the upper left corner of the generator in this pic. The hose that points up and to left goes to the rad. The hose that hooks under and to the right goes to the water pump.

Generator.JPG

I saw another thread that stated the engine had to be pulled to R&I the generator :( but the manual calls for removal of the front crossmember (subframe) to provide access. This confirmed my suspicion when i saw that post. Still no small job, but better than pulling the engine!
 
I had my radiator changed years ago. It wasn't bad. As I recall $425 for the complete job. I took it to a local radiator shop. That was for a new radiator, antifreeze and the install. They installed the new V radiator. Haven't had a problem since.
 
Condenser must go

I've confirmed that the condenser must be removed in order to replace the rad. Well, more specifically, the lower a/c line must be disconnected from the condenser. Once the a/c system is open, you might as well remove the condenser to give yourself a little more space to work with. It is almost possible to slide the condenser out of the way, but due to the poor design of the lower a/c line, there is not enough clearance to slide the condenser up and off of its mounting tabs on the rad. The offending line is shown here:
image.jpg

You can see that the a/c line is contacting the side of the rad -at the corner where the drain plug is. Otherwise I was able to remove all 8 of the hoses and lines connected to the rad with only moderate frustration. I'll post more pics of the process on reassembly. For now I am waiting for my vacuum pump to come in to service the a/c system.

I would say that a mechanic doing this job in the low $400 range including parts, fluids, and refrigerant would be a good deal (assuming the same process required for the LC3/V). In Houston, where I am, I doubt I could get this done for less than $800. Service costs are absurd here.:(
 
Last edited:
JOB DONE!!!

That was an interesting learning experience. :thumbsup

If your car is still driveable, go to a shop and have your A/C refrigerant recovered (but not filled) before you begin. You have to remove the condenser to remove the radiator. EPA regs blah blah blah

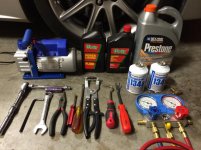
Tools and supplies needed for the job:
Dexcool (orange) coolant - ~ 3 gallons will drain
1 qt Power Steering Fluid - ~ 1/2 qt actually needed - there doesn't appear to be a specific type required
1 qt ATF - more of a check than anything, very minimal amounts came out
- 6l80e transmission calls for Dex VI - see later post on check procedure
- I also discovered the transmission is mounted directly to the rear axle, not the flywheel, and there is no fluid filler tube, just a fill hole with a rubber grommet and a "level check" drain bolt
A/C manifold gauge - can be had for $50 at harbor freight, I already had this from another job
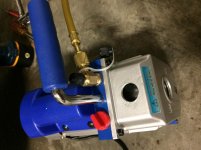
A/C vacuum/evacuation pump - I picked one up new on ebay for $55, essentially the same as the harbor freight unit, which they sell for $100
- one key difference on my ebay unit though gave me headaches, the fitting for the yellow line to the manifold was the wrong size, A/C threads are metric, and no hardware store carries metric fittings, you have to find an A/C supply shop if this happens to you, which will be closed on a weekend :dunno:
- I was a little concerned about quality when buying, but the unit pulled a strong vacuum
R134a refrigerant - system capacity is 1.4 lbs (22.5 oz.), I got (2) 12 oz. can (24 oz), I figure there was roughly an 1-1.5 oz. left in the manifold lines, so emptying the cans was about right
- "Eric the Car Guy" has good tutorial on recharging an A/C system, so I won't cover that
How To Recharge an AC System - EricTheCarGuy - YouTube
panel removal tool - for clips on front of air baffle
hose pick - very helpful
locking hose clamp pliers - essential for this setup
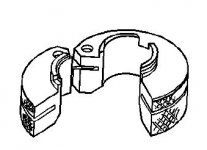
#2 and #3 flat head screwdrivers - I used these to remove the quick connect clips, but I wish I had gotten the proper removal tool in hindsight part# J41623-B, parts store tools don't have the notches to allow you to unseat the clips, this tool requires insertion at the right angle :laugh:, then twisting to unseat
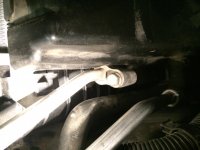
QCF Tool.JPG
- this tool is probably a dealer only item, maybe online, or you could possibly modify a standard tool by cutting notches into the collar
-the lower lines are pretty easy with screwdrivers, but the upper lines are tough w/ little space to maneuver
needlenose pliers - also used for placing removing the fitting clips
box wrench (18 mm i think) and allen wrench (8 mm i think) for sway bar end links
ratchet and extension
10 mm socket for fan bolts and rad support bolts
condenser bolts - used a standard size (1/2") socket

image.jpg

drain radiator by removing reservoir cap, then removing drain plug on lower right rear of rad - use a big pan/bucket

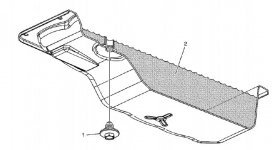
remove oil fill cap to remove engine cover (manifold sight shield)

image.jpg

the engine cover sits on three pegs like this

image.jpg

tip the cover up from the front, then lift the rear and remove

image.jpg

remove air filters

image.jpg
 
Last edited:
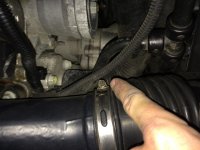
loosen band clamp screw on air intake

image.jpg

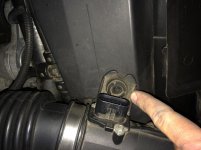
unplug MAF
there are four rubber grommets holding the air cleaner assembly in place, two in the middle here

image.jpg

and two at the front of the filter boxes
its easiest to unseat all the grommets, then pull off the end with the band clamp, then remove assembly

image.jpg

unclip MAF loom from upper rad support
there are four 10mm bolts - two per side to remove the upper rad support
two here

image.jpg

and two here, extension required
unseat the rad bleeder hose from the support, then maneuver the support out around the condenser and charge air lines on the right

image.jpg

jack up both front wheels and support on jackstands (use pucks or wood blocks on frame rails) , set e-brake, chock wheels - don't cut safety corners

sway bar needs to be removed in order to access the upper fan mounting bolt on the back of the rad
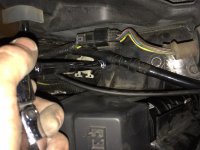
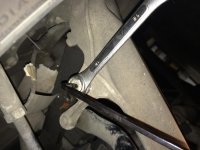
remove sway bar end link nuts - 18mm wrench on end links with 8mm allen in stud as backup - funky setup

image.jpg
 
Last edited:
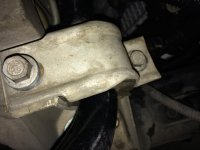
remove sway bar to frame mount bolts, remove sway bar
you have to maneuver this around the lower P/S line to remove, or disconnect the P/S line first

image.jpg

disconnect upper rad hose - hose clamp pliers and hose pick to unseat, you drained the rad didn't you?

image.jpg

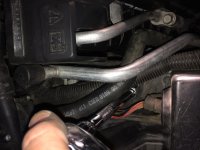
disconnect upper P/S line on left (driver's) below upper rad rose, have towels and pan ready, I used three separate pans for coolant, P/S fluid and trans fluid so that I knew much of each was lost

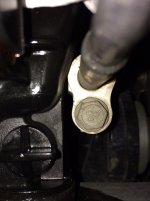
These are the quick connect clips - its basically a metal clip (kind of like a paper clip) that has to slide off, then just pull the fitting out, I wouldn't advise wrenching on the nut, you may crack the plastic tank, but I guess if you're tossing it anyway what the heck

image.jpg
 
Last edited:
The order of disconnection is not important.

Disconnect upper condenser fitting on left w/ bolt (1/2") - you discharged the A/C right?
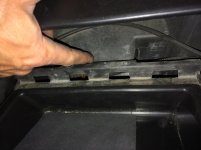
below this there is a plastic clip that retains the air baffle (which covers the charge air cooler and condenser), you need to remove this, and one on the other side, to give the air baffle enough play to slide the condenser out

image.jpg

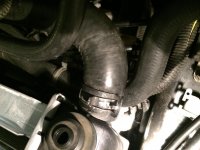
disconnect lower trans fluid line on right, and lower rad hose - get ready for a coolant bath
the lower rad hose is easier to disconnect if the lower condenser line is removed first, but not required

image.jpg

disconnect upper trans fluid line on right

image.jpg

disconnect coolant bleed off line on upper right

image.jpg

disconnect lower condenser line on right - next to drain plug

image.jpg
 
Last edited:
remove upper right fan assembly bolt (10mm), this is why we pulled the sway bar

image.jpg

remove lower left fan assembly bolt, the fan slide up and out of four mounting tabs on back of rad, you just need to unmount the fan assembly and leave in place, in can rest on the lower rad support

image.jpg

disconnect lower P/S line on left

image.jpg

disconnect generator coolant hose mid-left

image.jpg
 
Last edited:
The condenser mounts on four tabs on the front of the rad, no bolts
once lines are disconnected and baffle clips removed, hold baffle back and slide condenser up and out
It will tend to hang up on the baffle edges, just work it out slowly
If you plan to have the A/C system open for any length of time, it would be advisable to plug/cover the holes w/ something (tape, rubber, etc) to minimize water saturation.

image.jpg

double check that all of the lines are removed, and slide the rad up and out in the same fashion
rad and condenser removed

image.jpg

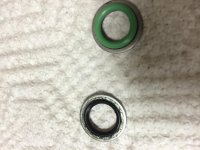
I was attempting to be proactive and replaced the condenser o-ring's with some generic A/C o-rings from parts store - these did not fit well and did not hold a vacuum at all - I ended up putting the old ones back on, which held fine, If you feel you need to replace them, this will be a dealer/online item - the GM o-ring is integrated to the metal washer

image.jpg

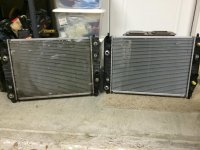
old rad and new OEM rad

image.jpg

now reverse instructions for reassembly

my condenser had a fair amount of debris and a lot of sand stuck in the fins, so I took the time to vacuum it off and then blow compressed air through the fins (not the internal). This appears to have improved the A/C cooling somewhat, not that it was bad before.

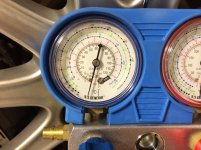
evacuate A/C system - gauge is pegged below zero - follow instructions from video linked a few posts prior, and let sit for 30 min to ensure system holds vacuum

image.jpg

my chinese unit pump with dual fitting added

image.jpg

refill P/S reservoir, cooling system - I prefilled the rad from upper rad hose port, follow video for A/C recharge, my extra tips would be to put the refrigerant can in a bucket of hot water to speed fill, and blow a fan on the condenser to simulate driving

when decide to crank the engine for the first time, be sure the cap to the P/S reservoir is off, I mistakenly put it on and air locked the pump even though the reservoir was full, belt squealing from locked P/S pulley ensued for a few seconds before i turned off the engine and figured what I had done - thankfully no damage was done - pump turned fine with cap off as air escaped

you will need to monitor the coolant level, the A/C charge, and the P/S level all at once

when doing a static (i.e. no vacuum tool) fill on the cooling system you will have to closely watch the engine temp. Excess air in the system will not bleed off fast enough to prevent overheating. Once the coolant temp hits 220, shut off the engine and allow to cool, this will draw further coolant in, and the next cycle should have enough air purged to function correctly. You will notice the cooling fan kick to full duty once the temp is 220 - that's your warning. You can resume A/C fill next cycle if not completed in time.

Take it for a drive and monitor P/S and coolant levels until all air is purged. Check for leaks. I had some P/S whine the first drive while air was being purged, after that it was fine. Work the steering wheel both ways to purge air, manual says not to go lock to lock though, as is common in other vehicles. Lock to lock was not necessary.

The next day I decide the caddy deserved a much needed bath, so I pulled my other rig into the garage and what do I see? drip, drip, drip... COOLANT LEAK! This is either very unlucky, or very lucky (that it didn't happen while the caddy was down) depending on your perspective. That just looks like a water pump gasket though, not as much trouble.

Cheers :D
 
Last edited:
Thank you, really appreciate your time/effort/consideration in posting your "adventure".
 
Help finding a coolant leak

Thank you, really appreciate your time/effort/consideration in posting your "adventure".
Gregg
Thanks so much for the extra effort to document this procedure. It helps every one on this forum that may experience radiator malfunctions. Glad to have you among us!!
V Happy:beerchug:
 
Transmission fluid level check

I'll be checking the trans fluid level for peace of mind, even though there was only a very small amount of fluid loss during radiator replacement - there could have been more fluid in the rad tank that did not drain from old rad.

I have confirmed that the transmission on the 06-V is the 6L80E (not the 5L50E - model years 04-05 - which takes Dex IV I believe) from both a visual inspection of the fill location on the pan, and the RPO code MYC on the parts sticker in the right storage well of the trunk. This make perfect sense, as the V - perhaps the 06 base - is a 6 speed, denoted by the first digit of the trans model number. :pat:

See description of trans here.

For checking/filling trans fluid, the manual notes:

"The transmission fluid level must be checked when the transmission fluid temperature (TFT) is between 30-50°C (86-122°F). If the TFT is not within this range, operate the vehicle or allow the fluid to cool as required. Setting the fluid level with a TFT outside this range will result in either an under or over-filled transmission. TFT>50°C under-filled, TFT<30°C=over-filled. An under-filled transmission will cause premature component wear or damage. An over-filled transmission will cause fluid to discharge out the vent tube, fluid foaming or pump cavitation."

"THE ENGINE MUST BE RUNNING when the trans oil level check plug is removed or excessive fluid loss will occur, resulting in an under-filled condition. An under-filled transmission will cause premature component wear or damage."

"Use Dexron VI transmission fluid only."

"1. Observe the TFT using the driver information center (DIC) or a scan tool.
2. Start and idle the engine.
3. Depress the brake pedal and move the shift lever through each gear range. Pause for at least 3 seconds in
each range. Move the shift lever back to PARK. Ensure the engine RPM is low (500-800 RPM).
4. Allow the engine to idle for at least 1 minute.
5. Raise the vehicle on a hoist. The vehicle must be level, with the engine running and the shift lever in the
PARK range.
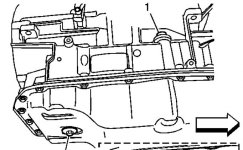
6. Remove the trans oil level check plug (1) from the transmission fluid pan. Allow any fluid (2) to drain. If the fluid is flowing as a steady stream, wait until the fluid begins to drip. If no fluid comes out, add fluid until fluid drips out."

I'll have to figure out if I can get the instrument cluster (DIC) to display trans temp, I haven't been able to do this before (haven't spend $$ on tech 2 yet). Otherwise I'll see if I can fit a thermometer probe in there, though I'm not sure it will be long enough to reach the fluid from the fill hole, and won't angle in from the check hole.

So your keys are: dex VI only, level vehicle while raised (ramps and/or multiple jack stands - be careful), warm fluid, cycle gears, engine idling, fill/drain until drip (not flow) from check hole.

It looks like you will need a pump (hand is fine) to add fluid, there does not appear to be enough space to position a quart and tube setup above the fill hole, I'll recheck this.

The fluid level check plug shown as #1 here.


Trans-Pan.JPG

The fill plug on the 6L80 is a rubber grommet with push-in center (like retainer clips) shown as #1 here.

Trans-Fill.JPG

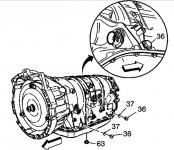
The fill plug on the 5L50 is in one of the locations shown here - marked as 36 - on the side of the pan.
5L50 Trans Fill.JPG
 
your coolant leak while garaged after driving

Let me know if you did not get a response. My dealer resolved mine after a second visit.


'06 V

I've got a coolant leak that I'm having trouble tracking down. It only leaks noticeably while the car cools in the garage over several hours, though I haven't been able to see it leak myself - just the small 3"-6" puddle it leaves. It does not appear to leak while the car is running - cold or hot. The puddle is under the front left corner, directly under the left side of the rad. At the moment I suspect a minor crack in the rad, though my reading of other posts indicates the V rad was a higher quality part. I attempted to pressure test through the reservoir cap, but the system did not seem to hold any pressure at all :dunno:. I did notice the coolant level dropped slightly while trying to pressure the reservoir, indicating an air pocket was being filled somewhat, though i could not see any further leakage. My second guess is the upper rad hose has a minor leak, possibly from a weak clamp. The water pump and surrounding area appears dry.

I've got some pictures showing the residue pattern on the left side of the rad and parts nearby.

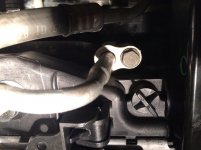
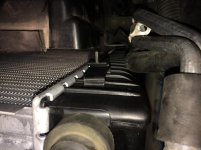
Here you can see a small amount of residue on the front of the rad side tank, a small pool on the frame rail, and further leakage down the side of the tank. The upper hose itself appears clean.
View attachment 4626

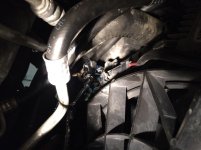
Here is a better angle of the spray on the front of the rad.
View attachment 4627

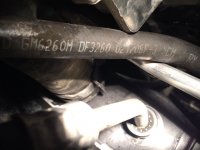
More of the front of the rad. You can see the label shows a date of 5/1/06 - not sure if there might have been a part update mid-year.
View attachment 4628

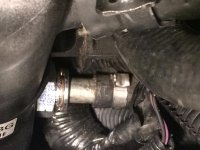
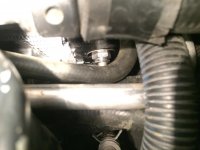
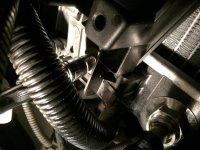
The drip path for most of the coolant seem to collect at the generator cooling hose connection at the rad. You can just barely see this hose from the top side - just left of the green striped cable conduit, above the frame rail in this picture.
View attachment 4629

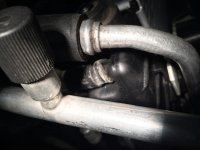
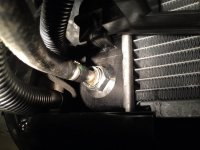
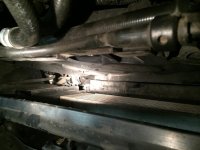
You can more clearly see the drip path to the generator cooling hose from the bottom here.
View attachment 4630

What do you guys think? Should I bite the bullet and replace the rad on a hunch ($220 OEM part)? It looks like the A/C condenser needs to be removed to do this. Does anyone have any other ideas to confirm a diagnosis? It was very surprising/strange to me that I could not sustain any pressure and see no further leakage while pressure testing. Has anyone seem this kind of spray pattern before?

Given that this appears to be a slow leak, I don't think we have a case of coolant spraying out every which way under pressure, meaning the highest location of residue would likely be the culprit, which seems to be in the vicinity of top front left corner of the rad side tank.

Thanks for any input,

Greg
 
Think you need to read the rest of the thread
 

Cadillac XLR Forums

Not a member?  Join now!  It's Free!

Learn more about Supporting Membership

Win 2 Supercharged Cadillacs!

Win both supercharged Cadillac Vs!

Supporting Vendors

Taput Tunning LLC

Top Hydraulics

Cadillac XLR Registry

Click here to enter the official Cadillac XLR and XLR-V Registry
Back
Top Bottom