Welcome to the Cadillac XLR Forums!

Finally got my XLR, Now to Rebuild it!

BlackCatXLR

Active Member
Joined
Feb 6, 2018
Messages
42
Location
wisconsin
My XLR/V(s)
2005 Black raven / Shale
Hi Everyone,
So I've already posted a brief history of this in the New Member Introductions a few weeks ago but I'll repeat it here now but with way more details and pictures as I work on this project.

"Been looking at this forum for years on and off and had been looking for a rebuilder XLR for just as long. Done quite a few salvage/rebuilders over the years and since I've always done well with them I figured probably the only way I'd ever get into an XLR would be to do it that way. Besides I kind of enjoy rebuilding them, a little bit of a hobby. Never done one to make money on, just for our own use.
Only ever seen a few XLR's on the road since they were new and never actually seen one in person.
Looked at quite a few over the internet but after lots of research realized most are either missing way to many expensive parts or just too much damage.
Finally spotted one a couple weeks ago at an insurance auction and it was such a good price I snapped it up. Damage looked pretty minimal but sight unseen besides in pictures is always risky and this was no exception. There's usually a good reason they are salvaged!
Buying was easy but shipping was a whole different story. Anyway finally arrived yesterday, dead battery, window open like 2 inches, locked up and keys laying on front seat!
Thanks to reading up on the forum I was able to fish keys off seat with a coat-hanger and get into trunk and pop open door.
Got it unloaded after some major hassles since it had 3 flat tires and a broken front spindle and A arm.
Have quite a few of the parts I need and a few coming in a couple days and looking forward to get it moving on its own.
I'm sure I'll have plenty of questions on this car but just to finally have one is unbelievable! Nobody I've talked to here has really even seen one or known what it is and it's all new to me too.
Anyway, looking forward to this project!"

So that was my first post but pretty much said it all.

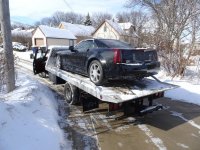
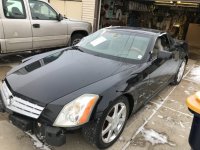
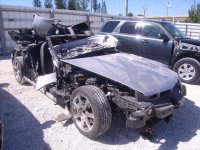
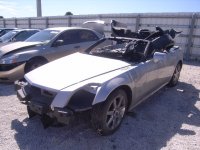
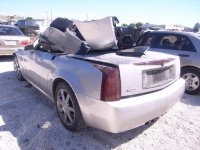
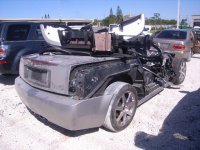
Anyway, this was my first view of the actual car! Like I said, I had never seen one in person and only maybe a couple on the road ever.

I have friends that have a small car lot and a flatbed and said they would help me get the car off the hauler luckily.
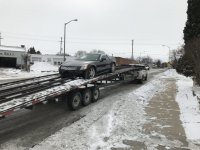
IMG_3154.jpg

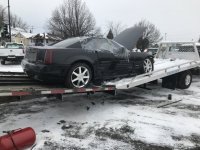
And this was how we had to get it off the trailer!
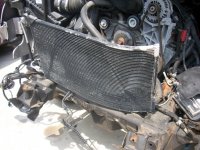
Was not fun. It was so low on the trailer and the tires refused to air up as they obviously had been flat for a while. We were just trying to get it off as the driver had to get going and I had to get to work. With the right front tie rod broke off the spindle I had to keep straightening out the wheel as we winched it forward. Also the radiator and condenser were just hanging and I wasn't sure why but of course they ended up getting caught in the trailer framework even though I was watching and trying to push them up as we winched it. Obviously they had been damaged some already as they were bent up pretty good previously but this sure didn't help. Regardless we got it off and on the flatbed. I was able to leave it parked on the flatbed for the rest of the week so I was going to come back the next day and look it over.

IMG_3156.jpg

This is the worst of the damage. Didn't really know the extent of it at this time but still looked pretty minor compared to some I've seen and also compared to some other projects I've done.
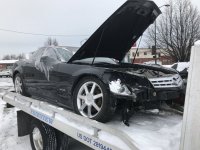
IMG_3162.jpg

Before I left we opened the hood and looked it over. The car was listed as non running but knowing how auction cars are I was hoping it wasn't anything serious. We looked in fusebox and sure enough someone had pulled all the relays out and scattered them all over the engine and everywhere else under the hood. Made some good guesses where they should go and put a jump pack on it and sure enough, started right up and sounded good!
There is hope!

Kevin
 
Hoping it goes well for you!

The fact that it started is a good sign. These are very complex cars and with some parts hard to find, it may be a challenge.

Keep us updated on your progress.
 
Ok, so next day I had a little time to look at everything and pull front wheel off.
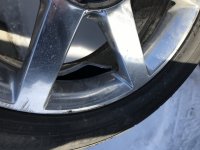
First off I noticed wheel was broke. Never saw one damaged like this. Outsides were perfect but interior was broken out. Can only figured hit something and it went right through tire and broke rim maybe?

IMG_3175.jpg

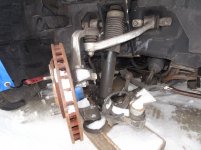
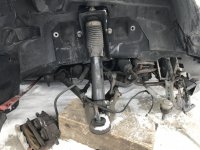
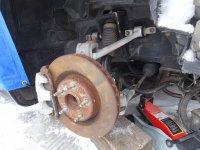
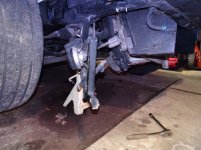
Whatever happened it hit wheel hard because this is what I found after wheel was off.
A little hard to see because of snow on parts but tie rod mount was broke clean off spindle knuckle!

DSC02654.jpg

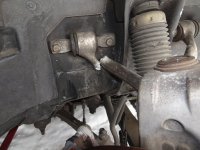
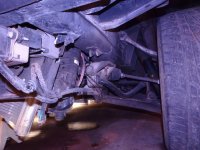
And then I noticed upper A arm was also broke. No wonder the wheel was so cocked sitting in there!

DSC02655.jpg

Everything came apart very easily and didn't look like there was any damage to anything but them parts.

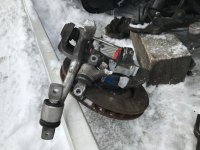
The damaged parts:

IMG_3210.jpg

Everything Removed:

IMG_3211.jpg

Luckily the XLR obviously shares a lot of parts with the Corvette and there was a yard nearby that had a 2005 vette. We called and they said they could deliver a complete spindle and upper A arm in a couple days.

  • :thumbsup

Kevin
 
"Before I left we opened the hood and looked it over. The car was listed as non running but knowing how auction cars are I was hoping it wasn't anything serious. We looked in fusebox and sure enough someone had pulled all the relays out and scattered them all over the engine and everywhere else under the hood. Made some good guesses where they should go and put a jump pack on it and sure enough, started right up and sounded good!"


If you need some pictures of the fuse blocks to determine relays locations let me know and I will send them to you
 
Whenever the suspension gets a good hit like that you should get it up on a lift and check to see if it moved the engine cradle. Just look at where the nuts are that fasten it to the frame, if it moved you will see the shiny spot where the nut used to sit.
 
Sure, If you'd like to send a picture that would be great. I think I have them all correct but still have a couple I didn't put in yet.

Also, yes, I did pretty much check out cradle and rest of damage. Didn't look like it moved or affected anything else but I will be taking into the frame shop I use and have him look it over and align it when I get it a little farther along. Looks like the broken parts pretty much took the blow and snapped.

I did a Jeep Liberty almost 10 years ago that had only 600 miles on it. That took a hit in pretty much same location. Did much more damage and yes, that one twisted and moved cradle. A lot of it wasn't obvious at first until he had it in the shop. Still came out ok on that and my nephew still has it and never had any problems and it has lots of miles on it now.

Kevin

I wish you well in your endeavor
 
Thanks for the well wishes and also thanks for the pictures. Looks like I have the relays in the right spots except for the ones not in yet (fog lamps and headlight washers ) I think. Didn't know there was a fusebox inside. I'll have to check that next.

So the spindle and A arm came a couple days later and I put that on.

DSC02665.jpg

That was the easiest fix I've ever done on a front end, very simple setup. I like it.
Now the car should be moveable. 3 of the tires aired up ok once I took the weight off them and I was able to find a brand new takeoff rim at a truck yard around here out of all places.
Took that in and had the scrub tire mounted on it for now just to be able to move it. Car will definitely need at least 2 new tires on front once it gets going.

Next day we were able to deliver it to the house so I could really look it over once we unloaded it.

DSC02684.jpg

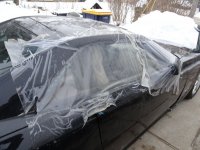
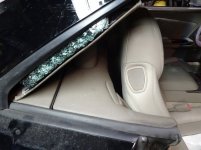
First thing I found out was the reason the passenger window was sealed up was not that the window was just down like drivers side but that the quarter window and passenger window were both broke out. Who knows what that was from, maybe someone couldn't figure how to get in!
:smash:

DSC02695.jpg

Regardless,

More parts to get!
<label for="rb_iconid_15">
gmnews.gif
</label>

Good news though, car moves back and forth and no warning lights except washer fluid low!

And,

IMG_3239.jpg

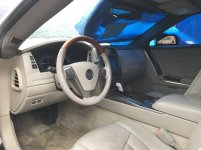
I finally get to sit in it and just admire it and run it for a while.
Engine sounds great but power steering pump makes some noise at first but quiets down eventually. Will probably need to be changed.

Kevin
 
Nice project

Once you get this car rolling, get it up on a lift, and inspect THE WHOLE FRONT END structure .

When the front end is hit or makes violent contact with a solid object, the attachment points from the "core support" to the "frame", will sustain damage .

This is probably why the radiator and condenser are loose . (they were hanging by their hoses)

With the front bumper, grill, and both headlamps removed, you will be able to use a "spool gun", to weld the aluminum attachment points, while holding the radiator and condenser in place .

After welding the broken areas, then assembling the steering and suspension, I would have the "frame straightness checked", and then do a "four wheel alignment" .

I have been looking around, for a totaled XLR, for a project Northstar motor I have, and have been learning quite a bit in doing so .

Good luck ..........
 
Thanks for the advise. It is going to frame shop when I get it a little further along. From what I have seen so far I haven't seen any other damage but once they check it over I'll know for sure. He has lots of experience repairing Corvettes.
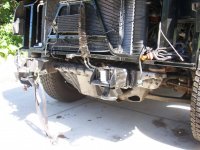
Yes, the radiator and condenser were hanging and I couldn't figure out what was supposed to hold them up.
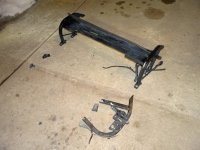
As you can see by the pictures there was just a piece of a framework with horns mounted hanging with muffler strap on one side and broken pieces of something on other. Whatever it was it was obviously rigged up before I got it.

DSC02702.jpg

DSC02704.jpg

So after some research here and on parts diagrams, figured it was called a "Skid frame" and looked like Corvette was same so we called yard spindle came from and they had one from same car!

Here is new used one with remnants from what was on car.

DSC02706.jpg

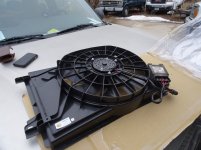
I had ordered a new cooling fan right before that so by the time I got skid frame I was ready to install it all. Fan came minus the module so I switched that from broken one from car. Fan itself was still ok but housing was totally destroyed.

DSC02711.jpg

So installing that was pretty tight quarters but after removing a few hoses and pulling some things out of the way a bit and then straightening twisted condenser and reattaching to radiator I was able to sneak fan back in and install skid frame and button that whole thing back up.
Amazing as it was, radiator never leaked and air conditioning is still charged up and works!:)
Kevin
 
YES

The "skid frame", is the lower part of the core support, and goes forward to the two "under front bumpers", that will contact curbs or parking lot stops (under the front nose) .

That cross member and it's brackets hold the whole front end together, and AFTER it is replaced, or re-welded into position, the front end wheel alignment can then be done correctly .
 
Last edited:
watch it closely

when they take a hit like that they usually fail after being driven for a while. A quick hard hit bends things but then when it heats and cools it will relax and fail so I would be real careful and watch the cooling closely. The ac can move a lot more than the plastic tank on the radiator.also check that skid plate for cracks where it mounts to the little angle brackets that bolt to the frame. after it hits the road a couple of times they crack. I have seen maybe a dozen riding around with at least one corner broken and hanging. That is most likely what had happened before the wreck. One or more tubes broke and they ties it up till it got wrecked this time
everyone on here should look at theirs from time to time to see if they are cracked.
 
Last edited:
Skid Frame Damage

Actually the new/used skid frame was cracked. On the side the 2 horns mount to, the welds were cracked where it connected to the main frame of it.
I took it to a welder here and he rewelded and reinforced it all. I can see where that part takes a LOT of abuse. It sits so low but I guess that's it's purpose.
As far as the radiator and condenser, the radiator really didn't take any damage besides the aluminum channel on the very bottom of the core. That got bent over a bit but nothing serious. The condenser is what got mangled. That's what got caught between trailer frame when we were unloading it. It actually got wedged so tight we had to use a huge pry bar to pop it back up over the frame. It also got a pretty good twist to it but straightened super easy.
I definitely will be watching it all but on air conditioning, if I don't have to remove anything I won't. Seems like once you crack that factory seal anywhere it's never like it was originally.


Check this picture out:

100_3477.jpg

This was my 2005 Silverado condenser when I rebuilt that one 11 years ago. Condenser was folded over on a radius on one end and at least 8" back. Truck was hit so hard on drivers side front corner that the brake booster was folded up into firewall from what was left of battery and fusebox pushing against it.
Instead of removing condenser which would of made work much easier I wired it up to hood when it was in frame shop. I took 2 pieces of 2X12's and some clamps and slowly pushed it all back straight.
Still to this day I have never touched anything with air conditioning on it and it still works perfect, never had to charge it up.

This was same truck after I got it back from frame shop:

100_3829.jpg

Kevin
 
Last edited:
ac condensers

That's what is funny about the condenser. I have went to take them off of ccars where they are wraped around a pole and almost doubled up and still hold a charge. On the other hand a bird will puncture it or even a small stone off the highway will put a hole in it and cause a leak.
 
First Test Ride

Well not really a test "ride" but more like driving up the alley and turning around just to see if it moves, steers and stops now that the radiator and condenser are secured.
First off, I've ran it for probably well over an hour just in the driveway warming it up and checking things over previously and really didn't see any problems besides the power steering pump whining some at startup. That seems to settle down after a while but figuring that's going to need changing eventually.
Seems to drive straight anyway and not pull wildly. Steering wheel is off slightly from straight but that will all get checked out soon at frame shop.

First thing I notice is when turning wheels sharp slowly while turning car around is that it sounds like tires are skipping or sliding. Almost sounds like front tires but when I checked everything out I didn't see any problems there so I'm almost figuring it's could be the posi unit in rear end as my 2005 Silverado kind of does the same thing every once in a while. On truck that gets solved just by doing some figure 8's in parking lot but I've also heard there is a different fluid now to use in there which I've never done.

Next thing is I have not heard cooling fan kick in yet. At what temperature should that kick in and what controls that?
Only once so far before I changed fan did I ever hear it kick on and that was unmistakable because fan shroud was broke and fan was rubbing on it.
Even then it just kicked in briefly. I did put the old fan control module I think they call it on new fan assembly as it didn't come with one.

IMG_3264.jpg

Overall though it runs and moves now!

Kevin
 
Replacing Broken Windows

So now that car moves around I wanted to replace the broken passenger window and quarter window.


DSC02698.jpg

First was the quarter window.

Basically just unsnapping a few fasteners that clip in to window frame that hold the headliner material and then 3 or 4 screws that actually hold the window frame in. Just lined it all up by eye so it fit in good.

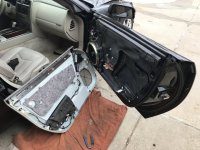
Next was removing door panel

IMG_3394.jpg

I did miss one screw under the courtesy light though and that plastic bracket broke when panel came off :pat:

There was also 1 huge electrical connector with a nice flip tab that released it from harness. Once that was off you can take panel completely off.
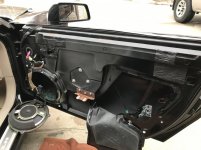
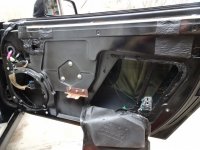
After that you just have to peel the rubber access cover off on right and remove speaker to get at window hardware.


One thing with this car so far is it so typical "
gmnews.gif
" on how everything is built and comes apart. Nice if you've worked on other similar year vehicles, at least for me. I've only done fairly easy things on it so far though.


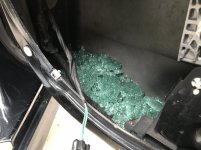
As you can see door was full of glass, even in speaker!

IMG_3395.jpg
IMG_3396.jpg

After cleaning that all up it was time to put the new passenger window in, (thanks Mickeytee for the tip on the NOS window!)


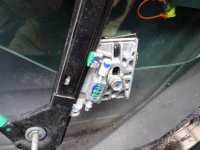
That was the simplest window I have ever had to change. It's just held in by 2 rubber lined clamps that pinch window front and back.


DSC02726.jpg

DSC02727.jpg

After a few minor adjustments to window position in clamps and running it up and down a few times and checking fit with seals and quarter window it was done and I reinstalled door panel.

Window worked fine right away, wet all the way up down and when door is opened it indexes down a half inch or so like it's supposed to.

Now for next project on it!

Kevin
 
Salvage XLR's

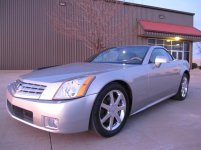
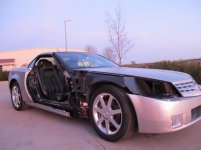
So after a system failure on one laptop and a hard drive failure on the new one I'm finally getting some pictures back together to post but in the mean time I thought I'd post some pictures of I think the first salvage XLR I thought about buying quite a few years ago.
It was an 04 with very low miles on it and didn't look like it was damaged all that bad and supposedly ran and drove just fine.
I had already started to price parts for it and was very close to buying it.

Here are some pictures that were on Ebay:

038.jpg

039.jpg

046.jpg

047.jpg

Didn't look like all that much chassis damage. Looked like it took a hit in the passenger door.

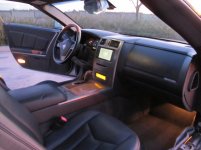
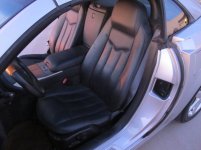
A couple shots of the interior. I thought it was weird that there were some what almost looked like a divot in the console and some either tears or divots in the drivers seat.

060.jpg

062.jpg

Overall though, I didn't think it was a bad deal at the time and was working out details to get it.
 
Typed VIN into Google

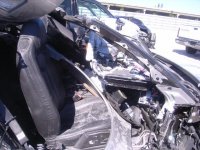
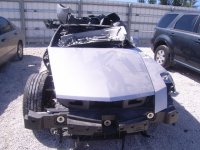
So for some reason I typed the VIN into Google and this is what came up.

Original auction pictures! I was shocked.

:jaw:

25653041_1X.JPG

25653041_2X.JPG

25653041_3X.JPG

25653041_4X.JPG

25653041_5X.JPG

25653041_9X.JPG

Well I see what the divots and tears are from in the interior!

Needless to say I passed on that one but it opened my eyes to what was out there!

Did anyone else see this car when it was advertised or know what happened to it?


Kevin
 
haha

that's funny. That looks like one a rebuilder from North Carolina buys and then sells on ebay with statements like No real damage , or used all original parts, No frame damage. HAHA. People looking to buy a salvage car would be wise to run the vin on google and see what it looked like before it was repaired. A good quality rebuilder has no problems taking and showing photos of the car before repair and also during .
 

Cadillac XLR Forums

Not a member?  Join now!  It's Free!

Learn more about Supporting Membership

Win 2 Supercharged Cadillacs!

Win both supercharged Cadillac Vs!

Supporting Vendors

Taput Tunning LLC

Top Hydraulics

Cadillac XLR Registry

Click here to enter the official Cadillac XLR and XLR-V Registry
Back
Top Bottom